How to Make an AI Voiceover for a Video (That Doesn't Sound Robotic)
Seven steps from script to a natural AI voiceover, including how to fix one line without redoing the whole track.
Your visuals are cut, the music is picked, and now the narration has to sound like a person instead of a GPS. This guide shows you how to make an AI voiceover for a video that sounds natural, from the first line of the script to the final export.
Here's the thing most people miss: AI voices rarely sound robotic because of the voice itself. They sound robotic because of the script and the mix. So most of this guide is about writing for the ear, listening back, and balancing the voice under music. You'll get seven steps, a fix-it table for common problems, and a quick checklist to run before you export.
Step 1: Rewrite the Script for the Ear
A script that reads well on the page often sounds stiff out loud. Use short sentences with one idea each, contractions, and plain words. Then read the whole thing aloud. Anywhere you stumble, the voice will too.
Spell out exactly what the voice should say. Write numbers, prices, dates, and acronyms the way you want them spoken, such as "twenty twenty-six" or "S-E-O." For brand or personal names that a voice might guess wrong, use a phonetic spelling.
Punctuation is your pacing tool. A comma gives a short breath, and a period or a line break gives a longer pause. If a line feels rushed, split it into two sentences.
Here's a quick before and after:
- Before: "Our platform facilitates accelerated onboarding for new users."
- After: "New users get started faster."
The second version is shorter, more conversational, and much easier for any voice to deliver well. If you're starting from scratch, learn how to write a production-ready video script first, then do this spoken-delivery pass on top.
Step 2: Pick a Voice That Fits the Video
Match the voice to the content and the audience. A calm, steady voice suits an explainer or tutorial. A brighter, faster-feeling voice suits a promo or one of your AI marketing videos. Preview several voices reading the same line so you're comparing voices, not scripts.
Use one narrator when there's a single speaker. For dialogue or a multi-speaker video, give each speaker a distinct voice so viewers can tell them apart without visual cues. This matters a lot for a faceless YouTube channel, where the voice carries the whole video.
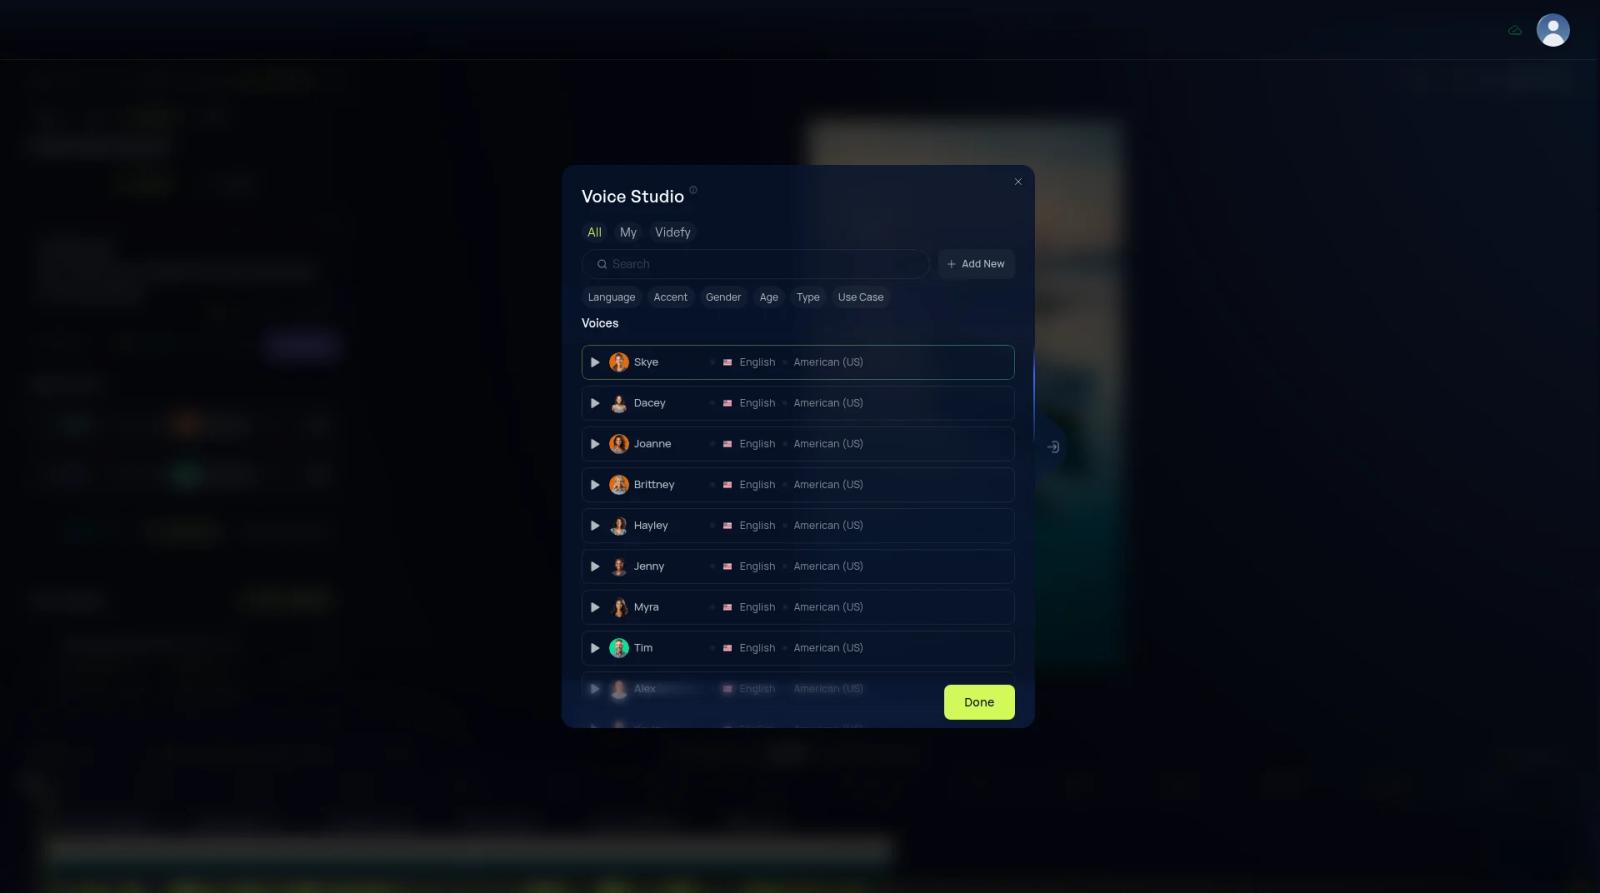
In Videfy, you choose from a large library of voices in the voice picker. You'll find it under Assign voices during story creation and under Audio Studio → Voiceover in Videfy Studio.
One ethics note: don't imitate a recognizable person's voice without their permission.
Step 3: Generate the Voiceover
Text to speech turns your script into audio, but doing it inside the video project means the voiceover lands right on your timeline.
In Videfy Studio
- Open Audio Studio → Voiceover and choose Script.
- Enter the words you want spoken and review the wording.
- Choose Continue to identify the speakers.
- Review the detected speakers and assign a voice to each one.
- Check the settings and the cost displayed, then generate.
Or During Story Creation
When you create a video from an idea, Assign voices comes right after the script. From there you can Generate Final Voiceover for the whole script, go Line by Line, or Skip and add the voiceover later. This flow works well when you make explainer videos with AI and want narration ready before you start on the scenes.
Already have a recording? Choose Audio to use your own audio instead. If you transcribe or translate it, check the words before you generate any new speech.
Step 4: Listen Back and Fix Single Lines
Do one focused listening pass. Check names, numbers, pauses, emphasis, the final sentence, and the joins between lines. The last line and the transitions are where problems tend to hide.
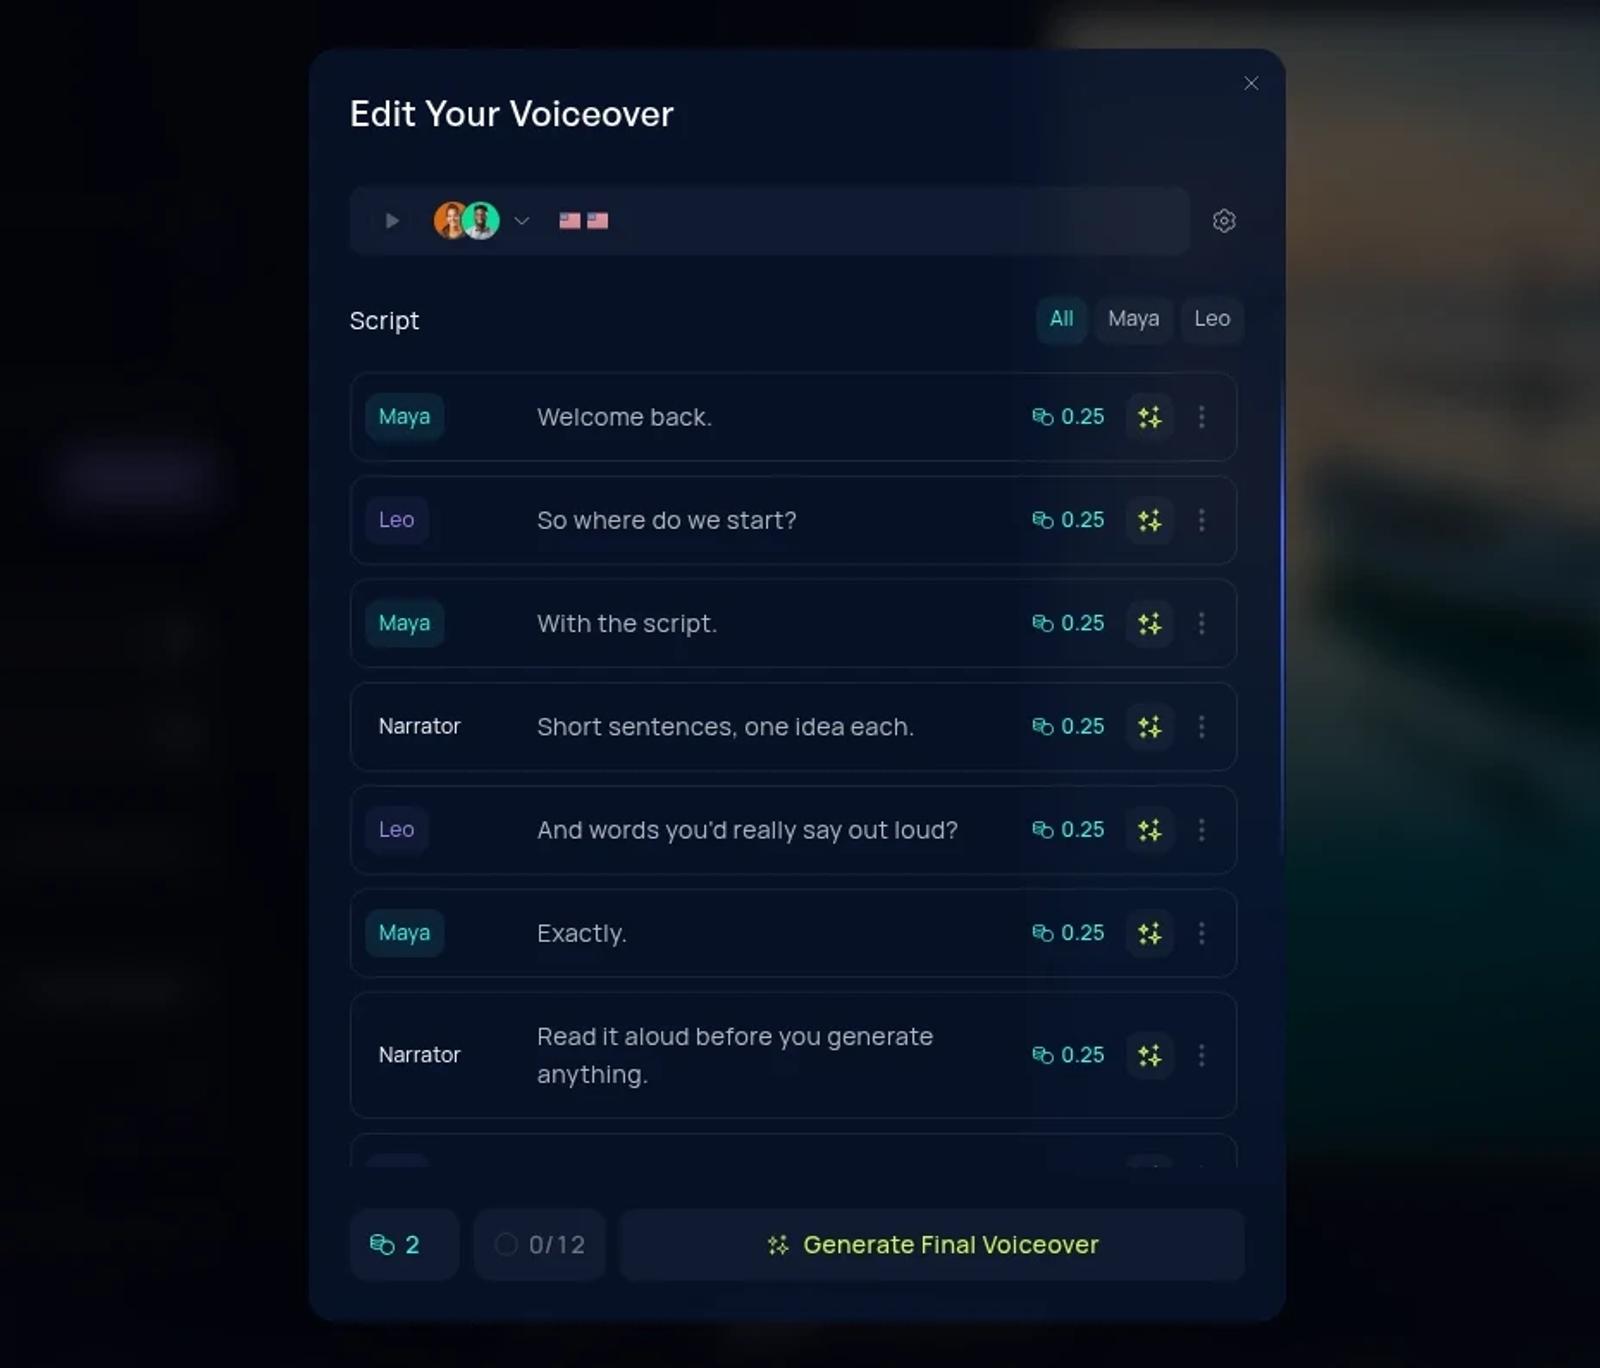
You don't need to redo the whole track to fix one mistake. In Videfy, choose Line by Line instead of generating everything at once. In Edit Your Voiceover, each line has its own regenerate button and shows its own cost, so you can generate one line, listen, and try again until it sounds right. The counter at the bottom shows how many lines are done. When every line works, choose Generate Final Voiceover, then play the assembled track to check the joins and timing.
Use this table to diagnose what you hear:
| Sounds like | Likely cause | Fix |
|---|---|---|
| Rushed | Long sentences | Split them into shorter ones |
| Flat | Formal, written wording | Add contractions and vary sentence length |
| Mispronounced name | How the name is spelled | Use a phonetic spelling |
| Weird pause | A comma or line break in the wrong place | Move or remove the punctuation |
| Voice changes between lines | Different voices or settings | Use the same voice per speaker and regenerate the line |
Step 5: Mix the Voice With Music and Sound
The voice should sit clearly above the background music at all times. Use fades so audio enters and leaves gently instead of cutting in. If you duck the music under speech, listen closely to the transitions in and out of each line.
In Videfy, select the audio clip on the timeline first. Then use Audio Studio → Basic for volume and fade in or out, and Tools for specific problems like noise, uneven levels, or long pauses. Make small adjustments and listen again after each one. If the controls are grayed out, you've selected an image or video clip instead of the audio clip.
Finally, check the mix on phone speakers and on headphones. A mix that works on studio monitors can bury the voice on a phone. For where this fits in the bigger picture, see this post-production workflow.
Step 6: Sync the Voice to the Picture
Lock the voiceover first, then time the visuals to it. It's much easier to move a clip than to rework a line of audio. Each line should finish while the relevant visual is still on screen.
If a line runs long, shorten the wording and regenerate it rather than forcing the voice to go faster. Trim clips, extend shots, and use J-cuts or L-cuts so the voice leads into or out of a scene. If you need a refresher on those techniques, this video editing tutorial covers trimming and cut types.
Step 7: Add Subtitles From the Same Script
One script can give you both the voiceover and matching subtitles. In Videfy, go to Subtitles → Use Voiceover Script so the text matches exactly what the voice says. Here's how to add subtitles to your video in more detail. Videfy can also translate the voice and subtitles when you need versions in other languages.
Before You Export: Quick Checklist
- Names and numbers are pronounced correctly
- Each speaker keeps the same voice throughout
- No clipped joins between lines
- The voice sits clearly above the music
- Each line finishes on the right visual
- Subtitles match the audio
Frequently Asked Questions
Can AI voiceovers sound natural?
Yes. Most of the difference comes from the script, with short, spoken phrasing, and from fixing individual lines. The voice you choose matters, but it matters less than how the words are written.
Can I use more than one voice in a video?
Yes. In Videfy, the speakers in your script are detected and you assign a voice to each one, which works well for dialogue and interviews.
Do I have to regenerate the whole voiceover to fix one mistake?
No. In Videfy, choose Line by Line and regenerate just the line you need to fix.
Can I use my own recording instead?
Yes. Choose Audio and add your recording, then clean it up in Audio Studio.
Make Your Next AI Voiceover for Video
A natural AI voiceover for video comes down to a script written for the ear, a voice per speaker, line-level fixes, and a careful mix. Open a project in Videfy, paste your script, assign a voice to each speaker, and fix any line without redoing the rest, all in the same timeline you edit in. Start free, no credit card needed.
For step-by-step detail, see the voiceover guide in the docs.